Introducing the DIY Sponge Manicure


Well, with the help of a sponge or two, we’re pleased to bring the gorgeous gradient trend to our nails in the form of a DIY Sponge Manicure.
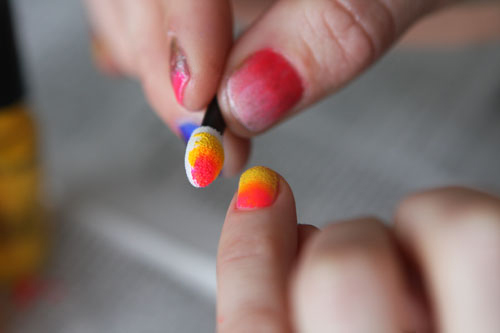
Materials:
- 3 nail polishes that work in a gradient (for ex: pink, orange, yellow)
- clear base and top coat
- nail polish remover
-eye shadow applicators
- 3 nail polishes that work in a gradient (for ex: pink, orange, yellow)
- clear base and top coat
- nail polish remover
-eye shadow applicators


If you love makeup as much as we do, you’ve probably got a few eyeshadow brushes lying around.
DIY Nail Paint Design

This nail design is super easy and can be used with a variety of different colours! Here we are doing mint base with lilac tips, cool combination perfect for summer!
1.Paint your nails with one solid color that you choose to be the base color. Here we are doing mint color as base. Let it dry completely.
2.Brush secondary colour over the tips diagonally, in two swipes, starting from the edge of your nail up towards the center. Let it dry completely. 3.And... Voilla!!! You are ready with the lovely pattern on your nails
Floral Pocket Shorts DIY

Things you'll need:
-Shorts
-Fabric
-Scissors
-Measuring tape/ruler
-Paper & Pen
-Needle
-Thread


First: Measure the dimensions of the pockets

Next: Recreate the dimensions of the pockets on a piece of paper (add 1/2" for folding) and cut it out.

Then: Use the paper cut out and trace it onto the fabric. Once you have it traced, cut out the fabric.
And fold back the !/2" margin.

It should look something like this ^

After that: Hand sew the fabric onto the shorts. This might take some time and can be a little frustrating at times...be patient though, it's well worth it!

And here they are! Spring & Summer ready ;)
If you love my first DIY post, make sure to leave a comment !
Thanks everyone and happy crafting!
No comments:
Post a Comment